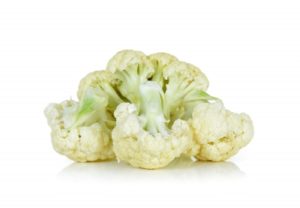
Cauliflower
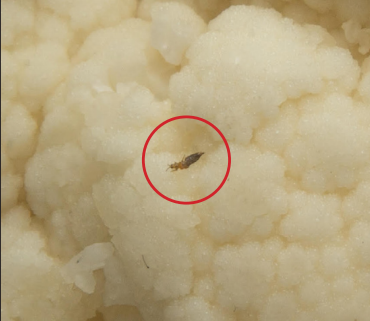
Thrips, worms, aphids
» Can be found on the surface of the cauliflower and/or between
the tightly packed florets.
VERY IMPORTANT NOTE: The method of inspection described below can be difficult in typical residential use. Nevertheless, we are presenting the method for checking cauliflower because it is sold in supermarkets that are under reliable hashgachos. However, it is recommended that you purchase frozen and/or fresh cauliflower from a reliably certified company.
In cauliflower, insects are often wedged between the tightly packed florets. Because the florets are so tightly packed, it is difficult for one to check raw cauliflower for insects. Therefore, the following steps are recommended:
Steps for cleaning cauliflower:
- Carefully examine the outside of the cauliflower. Detach all the florets from the cauliflower head; cut each floret vertically in half. If one bug is found, do not use; the likelihood is that there are more insects.
- Take all the floret halves and place them into a water-filled bowl / pan. Move around the florets; allow the florets to soak in the bowl / pan for five minutes.
- Take each floret/floret half and hit each and every floret against the side or bottom of the bowl / pan while the floret is submerged in the water.
- For the remaining steps, follow the thrip / mesh cloth method
PLEASE NOTE:
Specialized training is an absolutely necessary requirement in order to do this method properly and effectively. The video linked below clearly presents the absolute need to be trained and approved before performing this type of inspection.
Thrip / Mesh Cloth Method:
1. 2 Large containers
2. 2 Colanders
3. Vegetable Wash or any Other Soapy Solution
4. Special Mesh Material (Call Vaad Office to Obtain Material)
5. Light box
6. Spray Bottle
7. Toothpick
8. Loupe to Confirm Insect’s Prese
STEP 1: Pre-checking the produce
- Separate the bunches of herbs/florets/leaves; proceed with the following steps:
- Firmly hold each bunch/floret/leaf and forcefully hit it against the light box (if produce is noticeably wet it should be dried in a vegetable spinner prior to this step).
- Inspect the light box for insects after hitting each bunch/ floret/leaf (do not wait to inspect the light box until after hitting all the bunches/florets/leaves).
- If, after inspecting the light box, 3 insects of any type (aphids, thrips, mites) are found, the product should not be used.
- If there are fewer than 3 insects, then proceed with Step 2:
STEP 2: Washing the produce
- Fill one container with soapy solution and cold water, using enough solution to make the water feel slippery without causing an excessive amount of suds.
- Place the totally separated produce into the container; leave it for five minutes. Then thoroughly move around the produce. Be sure not to overload the container, leaving ample room to soak and move around the produce.
- Remove the produce from the container; rinse the produce very thoroughly under a strong stream of water. Proceed with Step 3.
STEP 3: Final preparation for checking produce
- Place produce into second clean container; repeat Steps 2a and 2b.
- Line one colander with the mesh cloth and place the second colander into the lined colander so that they fit closely together. Drain the soapy water from the container through the colanders, ensuring that all the contents (including sudsy film adhering to the container walls) are washed out of the container and drained through the mesh cloth.
- Remove mesh cloth from between the colanders and place on light box.
PLEASE NOTE: You are checking the contents that were in the water
STEP 4: Checking thrip / mesh cloth
- Use the spray bottle to dissipate suds for easier inspection.
- Use the toothpick and the spray bottle to assist in separating all debris until completely separated.
- Carefully inspect mesh cloth for the presence of insects (aphids, thrips, mites).
- If even one insect is found, this can indicate that there are more insects in the actual product, and the entire process (Steps 2, 3, 4).
Gallery